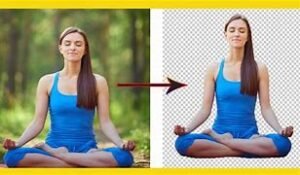
How to remove Background from a picture Look no further! Removing the background from a picture is easier than you think. Whether you’re looking to create professional graphics, enhance product images for your online store, or just want to have some fun with your personal photos, we’ve got you covered. In this blog post, we’ll walk you through four different methods for removing backgrounds from pictures so that you can achieve the desired effect and take your photography skills to the next level. So grab your favorite photo editing software and let’s get started!
Method 1: Use the Background Eraser Tool
Method 1: Use the Background Eraser Tool
Adjust the brush size depending on how large or small you need it to be for your specific project.
Next, adjust your settings. You can choose between three sampling options – Continuous, Once or Background Swatch – depending on what works best with your image. You also have control over tolerance levels and limits, so play around with these until you find something that works well.
Once everything is set up correctly, start erasing away at the background of your image. Be careful not to overlap onto any important parts of your subject!
When finished removing all unwanted background areas, save as PNG file format with transparency enabled so that only visible parts are saved
Method 2: Use the Select and Mask workspace
Method 2: Use the Select and Mask workspace
If you’re looking for a way to remove the background from an image without losing any details, then the Select and Mask workspace is definitely worth trying out. This method allows you to refine your selection using several tools that are specifically designed for this purpose.
To start, open your desired image in Photoshop and select the subject using one of the selection tools such as Lasso or Quick Selection. Once selected, click on “Select and Mask” button located on top of the screen.
This will bring up a new dialog box with various options for refining your selection. You can adjust properties like edge detection, feathering and contrast by playing around with sliders to achieve accurate results.
In addition to adjusting settings, there are also brush tools available within Select and Mask workspace that let you touch up areas where necessary. For example, use Refine Edge Brush tool when removing hair or fur from an image.
Once satisfied with your adjustments made inside Select and Mask workspace simply hit OK button to apply it onto your original layer – leaving only selected object visible while rest of image turns transparent!
Method 3: Use Quick Selection or Magic Wand tool
Method 3: Use Quick Selection or Magic Wand tool
If you need to remove the background from a picture quickly, then using either the Quick Selection or Magic Wand tool is an effective option. These tools can be found in most photo editing software and are great for removing backgrounds with solid colors or distinctive edges.
To use these tools, simply select the appropriate one and click on the area of your image that you want to remove. The software will automatically identify similar pixels and create a selection around them. You may need to adjust the settings depending on how accurate you want your selection to be.
Once you have made your selection, hit delete and voila! Your background should now be removed. However, keep in mind that these tools may not work as well if your image has more complex details such as hair or fine lines.
It’s always best to try out different methods until you find one that works best for each individual project. Don’t hesitate to experiment with different techniques until you get it just right!
Method 4: Remove the background with a layer mask
Method 4: Remove the background with a layer mask
If you are looking for more control over your image’s background removal, then using a layer mask would be an excellent option. This method is non-destructive, meaning that it does not alter or damage the original image.
To start, open your image in Adobe Photoshop and duplicate the background layer by clicking on it and pressing Ctrl+J (Windows) or Command+J (Mac).
Next, select the duplicated layer and click on the “Add Layer Mask” button located at the bottom of the Layers panel. A white thumbnail will appear beside your duplicate layer. Start painting over areas of your image where you want to remove its background.
Furthermore, if you accidentally paint away parts of your subject while removing unwanted backgrounds from images using this technique, switch back to white as your foreground color and continue painting to bring them back into view again.
After successfully masking out all unwanted portions of an image’s background with this approach – save it in any desired format!
Method 4 provides greater flexibility compared to other techniques when aiming for precise results without damaging original content!

Conclusion
Removing the background from a picture can be tricky, but with these four methods, it’s easy and quick to achieve. Whether you’re using the Background Eraser Tool or Select and Mask workspace in Photoshop, or Quick Selection or Magic Wand tool for simpler tasks – removing backgrounds has never been easier.
The key is to experiment with each method until you find one that works best for your particular image. Keep in mind that no single method will work for every situation. So don’t be afraid to try out different tools and techniques until you have achieved your desired result.
With practice, removing backgrounds from images will become second nature. Before long, you’ll find yourself quickly editing photos like a pro!